HTML Basics
HTML is the standard language used to define what you want to display on your webpage. It stands for HyperText Markup Language.
With HTML, you can tell a browser to display some text as a heading or to draw a table for you. It’s a simple but powerful language.
in this part, we will give you all the basics that you need to know to write a simple blogpost. In the next part, we’ll look at how to integrate links and images on your page.
If you want to learn more, have a look at the HTML tutorial created by w3schools. w3schools also has a very cool editor that allows you to play around with html and immediately displays the results of the change.
Blog Post Template
Here’s a simple blog post template that we’ll use to explore the anatomy of a webpage.
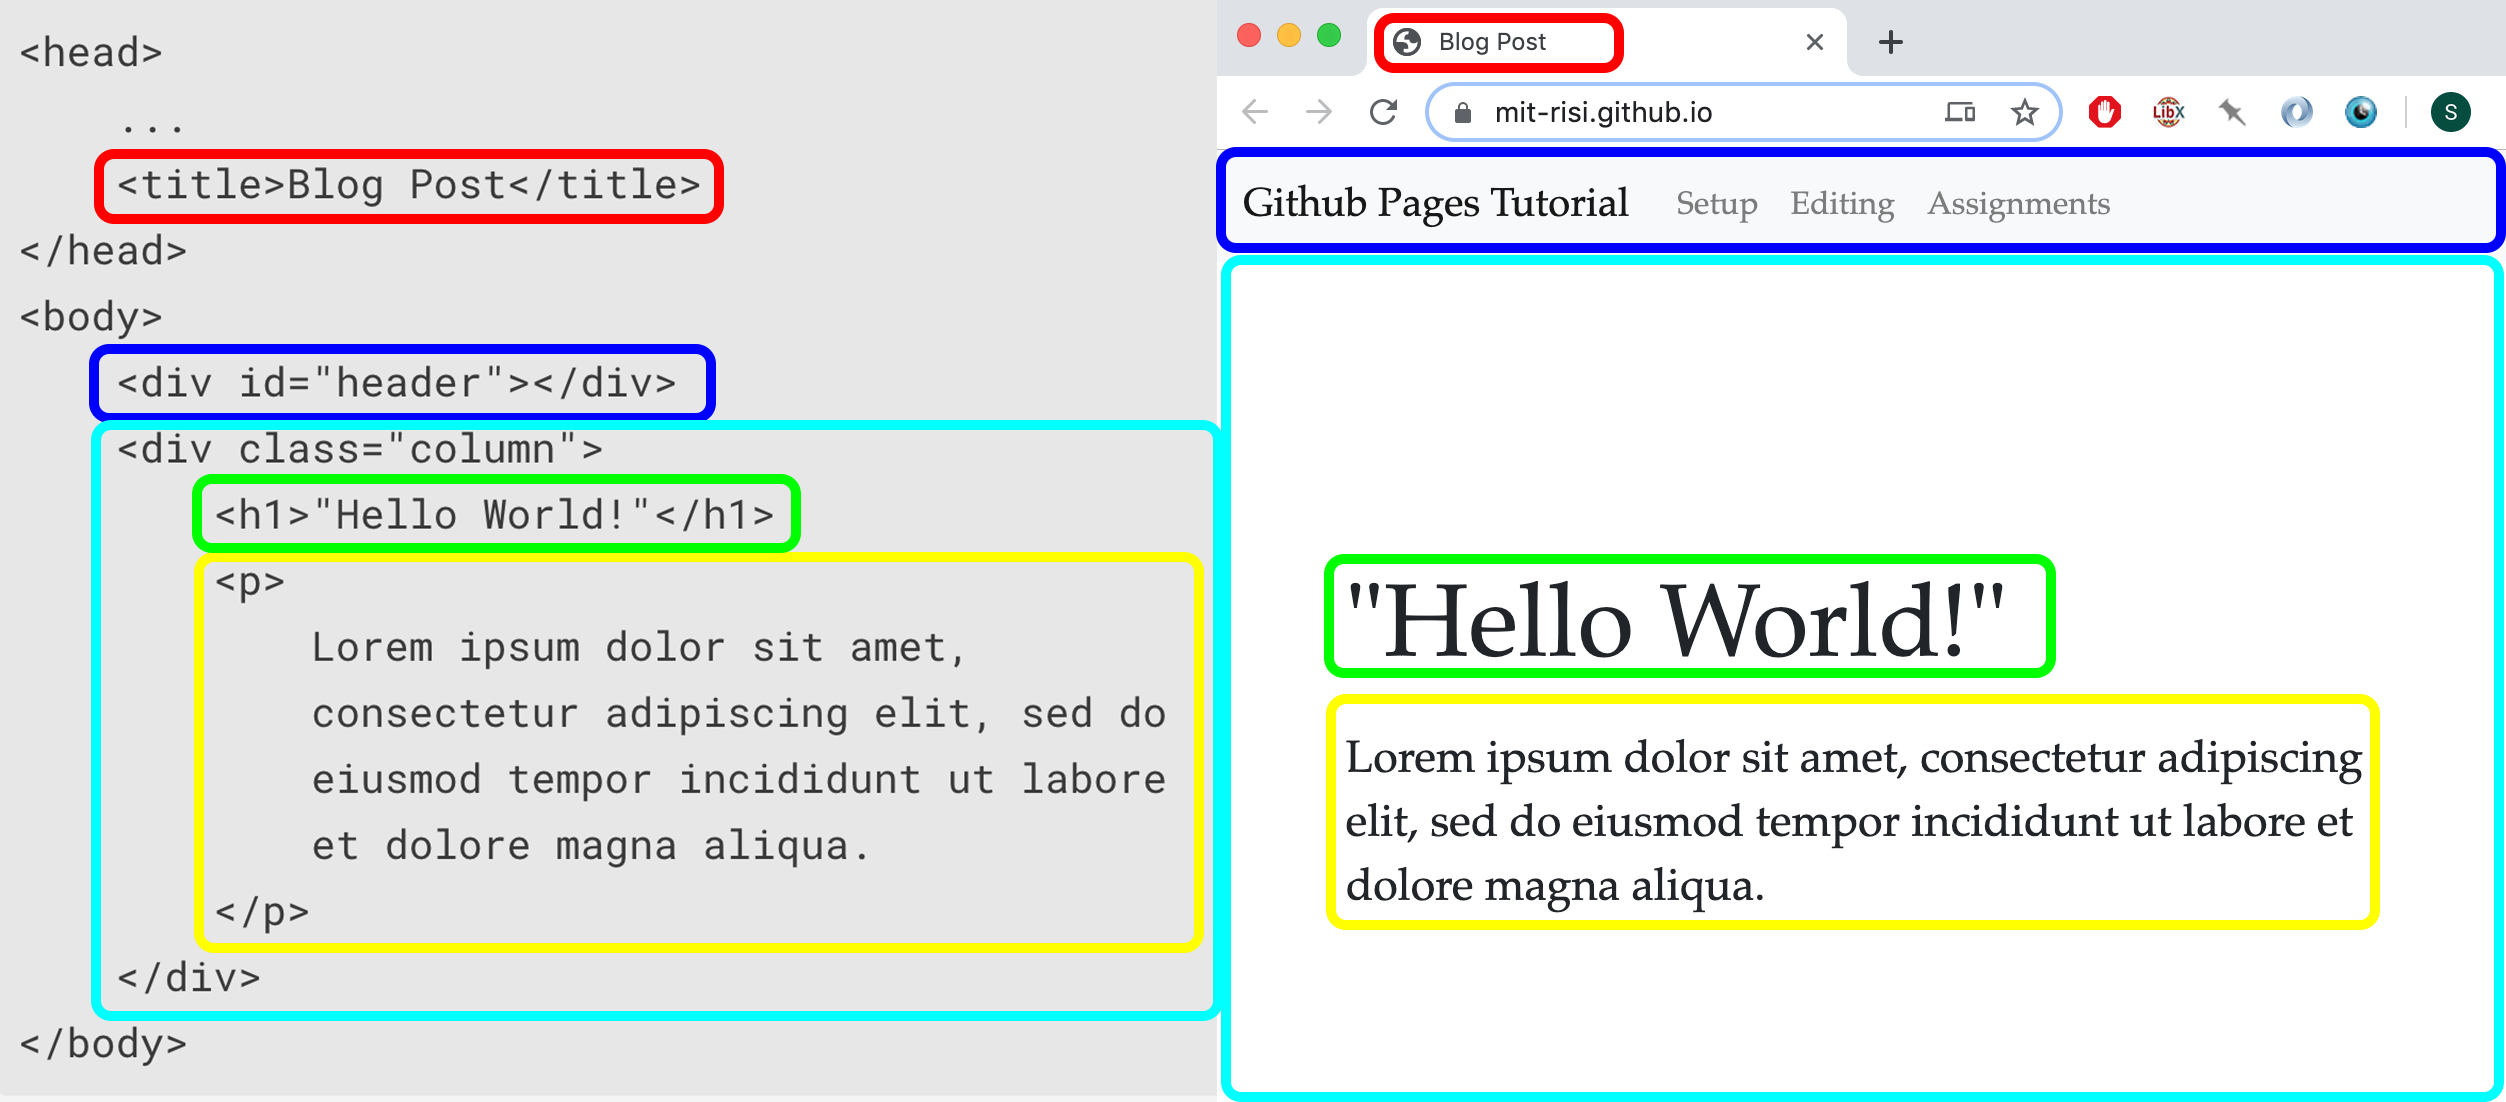
HTML consists of nested elements. Each element gets opened with <element> and closed with </element>.
Remember from the last section: <h1> opens a header-1 (the largest kind of header) and </h1> closes it.
<head> and <body>
The two main parts of a webpage are the <head> and the <body>.
The contents of <head> are not displayed. Instead, it’s where javascript and css files can be loaded and where you can set the title of the webpage. The title set here is not displayed on the webpage itself but rather shows up in the browser tab.
Except for setting the title, you can leave the <head> untouched and just copy its content to new pages.
The <body> is what actually gets displayed on the webpage.
Divs
The <body> usually consists of a number of <div> (“division”) elements.
There are two divs in our blog post template.
The first one renders the navigation bar at the top of the website. Rendering it involves some trickery that we will ignore for the moment.
The second div consists of the content of the blogpost. Note that this div has the class “column.” The class defines how the div should be rendered–What font? How much whitespace? How to handle small devices? You don’t need to know how styling with cascading stylesheets (css) work for the moment. Just make sure that when you create a new page, the div with most of your content has the class “column” like so:
<div class="column">
            ....
        </div>
Headings and Paragraphs
Your actual blogpost will consist of headings and paragraphs.
We have already seen <h1>, the largest kind of heading:
h1
HTML provides you with six different headings from <h1> to <h6>, the smallest one:
h6
The actual text of your blog post belongs into <p> (“paragraph”) elements, which handle, for example, line breaks for you.
That should give you all you need to know to write your first blog post. I suggest that you try to get this template to work on your landing page (index.html). Once you’re done, you can move on to the next section, which deals with links and images.